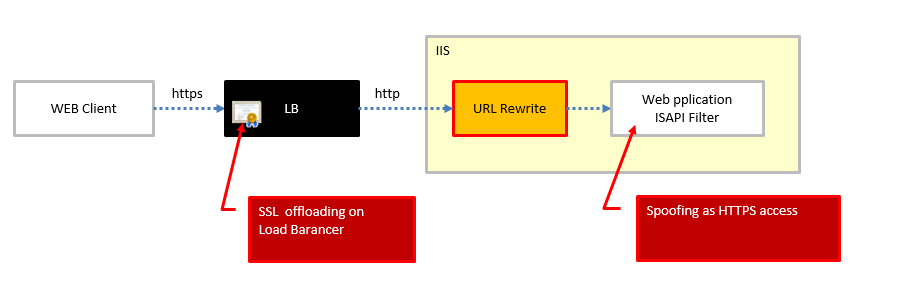
Despite SSL offroading on the Load balancer, Spoofing Web Applications as being accessed by HTTPS . (URLRewrite,IIS)
Despite SSL offroading on the Load balancer, Spoofing Web Applications as being accessed by HTTPS .
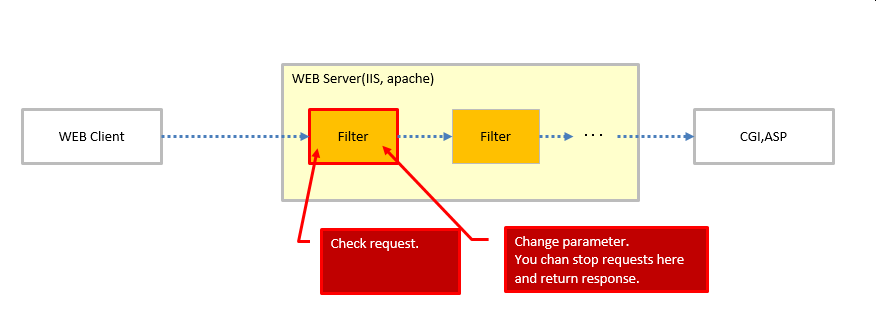
- Install URLRewrite module to IIS
- on the URL Rewrite module setting, Add “HTTPS” on “server variables”
- write web.config as follows.
<?xml version="1.0" encoding="utf-8"?>
<configuration>
<system.webServer>
<rewrite>
   <rules>
       <rule name="backend" patternSyntax="Wildcard">
           <match url="*" />
           <serverVariables>
               <set name="HTTPS" value="on" />
               </serverVariables>
           <action type="None" />
       </rule>
   </rules>
</rewrite>
</system.webServer>
</configuration>